How to wire a dimmer switch

A white dimmer switch

Wiring a dimmer switch might seem complicated, but it doesn’t have to be. With just a few simple steps, you can add a touch of ambience to any room by controlling the brightness of your lights. 

In this guide, we’ll break down the process of wiring a dimmer switch in the easiest way possible, so you can confidently tackle this task without getting stuck. Let's dive in!


Table of contents

  1. How do I choose the right dimmer switch?
  2. What tools do I need to wire a dimmer switch?
  3. How to wire a dimmer switch in 8 easy steps
  4. Want to switch off from electrical repairs?

How do I choose the right dimmer switch?

Choosing the right dimmer switch starts with understanding the type of lightbulbs that you’ll be using. Not all dimmer switches are compatible with every kind of bulb, so it’s essential to check before you buy. For instance, LED bulbs require a specific type of dimmer switch, while incandescent or halogen bulbs may work with more traditional dimmers.

Always look for compatibility information on both the dimmer switch and the bulb packaging to ensure they’ll work together smoothly.

What tools do I need to wire a dimmer switch?

To complete the steps to wire a dimmer switch you will need the following tools:

  • Screwdrivers (flathead and Phillips-head)
  • Wire stripper/cutter
  • Needle-nose pliers
  • Tape measure
  • Voltage tester
  • Dimmer switch
  • Wire connectors
  • Labels or tape
  • Replacement faceplate (if needed)

How to wire a dimmer switch in 8 easy steps

Step 1: Turn off the power

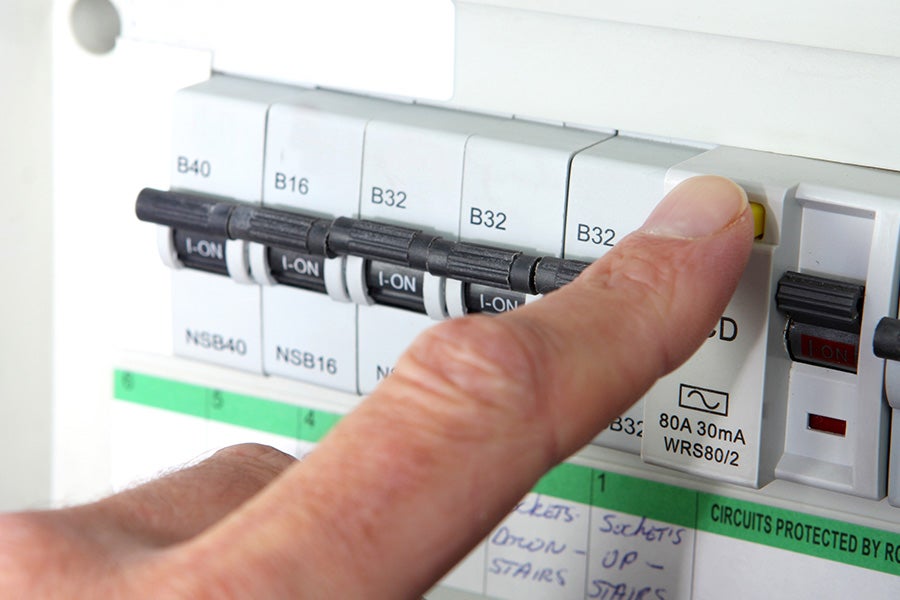
Before doing any electrical work, it’s crucial to turn off the power at the fuse box to avoid any accidents. Double-check that the power is off by flipping the light switch on and off to ensure the light is no longer functioning.

Step 2: Remove the old faceplate

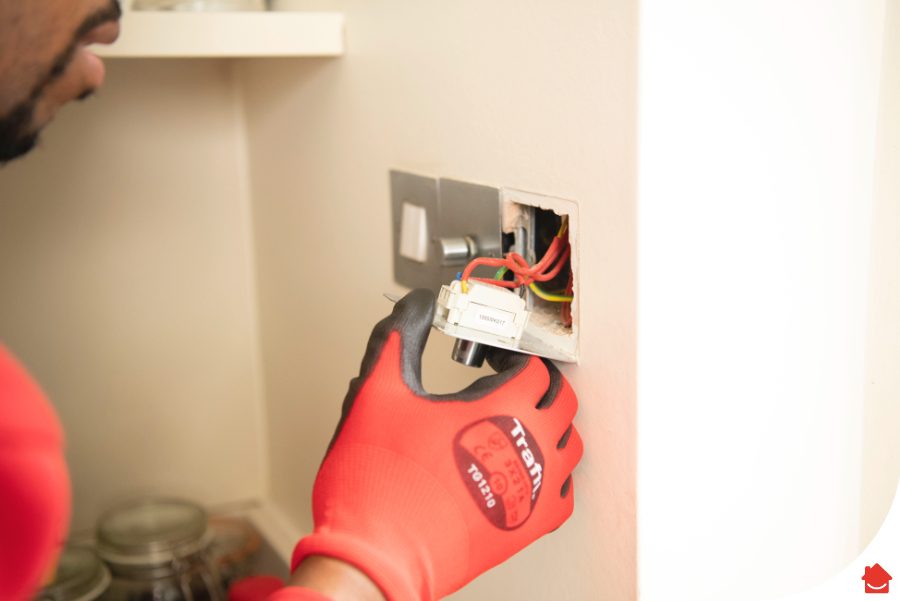
Use a screwdriver to unscrew and remove the faceplate covering the current switch. Carefully set aside the screws and faceplate for later use if needed.

Step 3: Test the current

Before handling the wires, use a voltage tester to make sure there is no active electrical current. This is a crucial safety step to prevent any electrical shocks.

Step 4: Label wires

Take note of how the wires are connected to the existing switch. Label each wire or take a picture for reference. Keep in mind that different switches will have different configurations so they might not be like for like. If this is the case, focus on identifying the wires so you can match them up to the correct locations in the new switch.

Step 5: Disconnect wires

Once the wires are labelled, carefully disconnect them from the old switch. Unscrew or unclamp them, depending on how they are attached.

Step 6: Connect dimmer switch

Follow the wiring instructions provided with your dimmer switch.

Typically, you will need to connect the live (brown or red) wire, neutral (black, blue or grey) wire, and earth (green and yellow) wire to their respective locations on the dimmer switch. Make sure the connections are secure.

Depending on your existing switch, the earth wire may not be connected. If you’re replacing a plastic switch with one that has a metal faceplate, the earth wire will need connecting to the appropriate terminal. The connection point for the earth wire may be labelled with the below symbol.

A symbol indicating an earth terminal

Step 7: Connect the new faceplate

Once the dimmer switch is connected, place it into the electrical box and screw it in place. Then, attach the faceplate over the switch, securing it with screws. Make sure you don’t catch or pinch any wiring when attaching the faceplate.

Step 8: Turn the electricity back on and test the switch

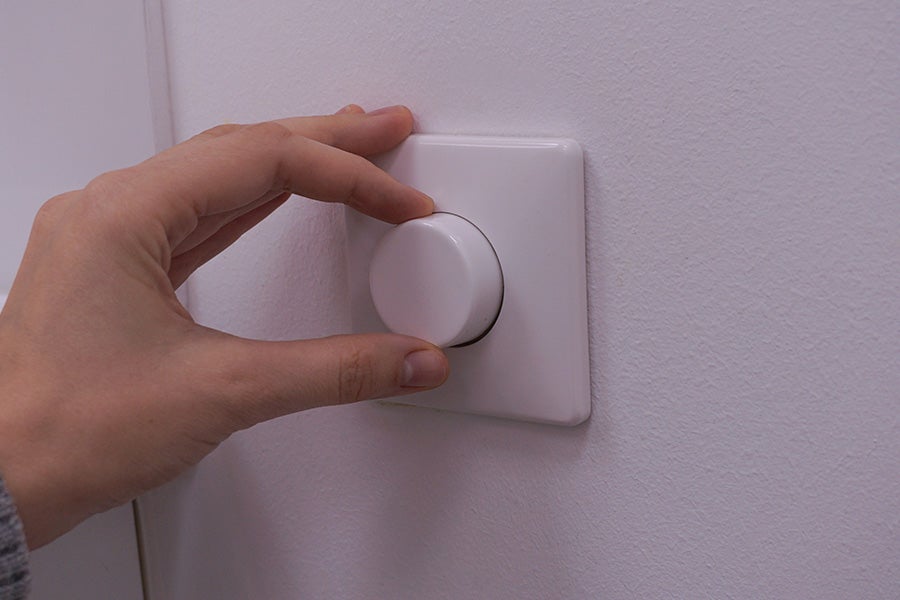
Go back to your fuse box and turn the power back on. Test the new dimmer switch by turning it on and adjusting the light levels. If everything is working correctly, you’re done!

If the switch on your fuse box trips and doesn’t stay on, then the switch may have been installed incorrectly, or you may have a loose connection.

Make sure the power is off and go back to the switch to trace your previous steps. If you can’t see what the problem is it may be best to call a qualified electrician to finish the job.

Want to switch off from electrical repairs?

Wiring a dimmer switch can be a bit tricky, and sometimes you need an extra helping hand. Whether it's a simple light switch fix or a more complex electrical issue, our home repairs membership, Ding is the easy way to get it done.

Ding is a home repairs membership, where you can access qualified electricians for your light and electrical repairs, big or small. Try Ding today for £5 a month.

Share this post

About the author

After an early and varied career, including serving in the Falklands and also working as an active firefighter, Sam began his journey as an electrician in the 1990s as an apprentice with Bowdens Electrical contractors.

Since becoming qualified in 1995, Sam has worked on a broad range of electrical repairs and installations, including caravan site supplies, wiring of new build houses, and response to out of hours calls. His experience extends to both domestic and commercial projects, including working on electrical installations in large businesses such as shopping centres, residential homes, street infrastructure and many others.

Since joining HomeServe in 2018, his role has changed from being ‘hands on’ to a more knowledge and research based position within the Technical Governance Team, ensuring the business operates in a way that meets, or surpasses, industry regulations and standards.

“I thoroughly enjoy working with HomeServe and almost every day brings a new challenge.”

He loves spending time with his bulldog Bert, sailing his yacht or walking in the countryside.

Institute of Engineering & Technology-technician member, Institute of Engineering & Technology member. Solar PV Systems installation & inspection, City & Guilds 2382, City & Guilds 2330, City & Guilds 2391, City & Guilds 2377, City & Guilds 2377-1, Tetra Working at Height, Tetra Restraint Equipment Inspection, Tetra Electrical Equipment Inspection, LCL Electric Vehicle Charging Systems, I.O.S.H. Management

Years qualified

Since 1995
Read more

Still looking for more help & advice?

Our help & advice articles cover Plumbing, Home heating, Electrical, Energy-saving and Home maintenance.

View all articles